
Yoga for Flexibility: How to Safely Open Up Tight Hips and Hamstrings
Modern daily life is structurally aggressive toward the human body. Between prolonged desk sitting, long commutes, and sedentary leisure time, the musculature of the lower body remains in a chronically shortened state. The primary casualties of this lifestyle are the hips and the hamstrings. Tightness in these areas is not merely an inconvenience that prevents you from touching your toes; it alters pelvic alignment, causes kinetic chain disruptions, and is a leading contributor to chronic lower back pain.
Yoga offers a systematic, therapeutic methodology to reclaim flexibility, but only when practiced with precision and anatomical awareness. Aggressive stretching can trigger the body’s defense mechanisms, leading to protective tension or acute injury. This comprehensive guide outlines the anatomy of lower body tightness, provides a safe, progressive sequencing framework, and details exactly how to open your hips and hamstrings without compromising your joints.
The Anatomy of Tightness: Why Your Hips and Hamstrings Feel Frozen
To safely increase flexibility, you must first understand the structures you are trying to lengthen. The hip joint is a deep ball-and-socket joint surrounded by over twenty muscles, while the hamstrings are a collection of three long muscles running down the back of the thigh.
The Hip Complex
The hip is designed for multi-directional mobility, but sitting locks it into a single plane of flexion.
-
The Hip Flexors (Iliopsoas): This group connects your spine and pelvis to your thigh bone. When you sit, the psoas remains shortened. Over time, it adapts to this length, pulling the pelvis into an anterior tilt when you stand, which strains the lumbar spine.
-
The Deep External Rotators and Glutes: Muscles like the piriformis can become incredibly tight or weak from inactivity, compressing the sciatic nerve and restricting lateral hip rotation.
The Hamstrings
The hamstring complex consists of the biceps femoris, semitendinosus, and semimembranosus. These muscles cross two joints: the hip and the knee. Because they originate at the ischial tuberosity (the sit bones) and attach below the knee, their tightness impacts both joints. When hamstrings are rigid, they pull the pelvis into a posterior tilt, flattening the natural curve of the lower back and causing structural fatigue.
The Golden Rules of Safe Flexibility
Before stepping onto the mat, you must understand the neurological and physiological mechanics of stretching. Forcing a posture will yield the opposite of your intended result.
1. Work with the Stretch Reflex
Within your muscles reside sensory receptors called muscle spindles. When a muscle is stretched too fast or too far, these spindles signal the nervous system to contract the muscle to prevent a tear. This is the stretch reflex. To bypass this protective contraction, you must enter poses slowly, hold them for at least 30 to 60 seconds, and breathe deeply.
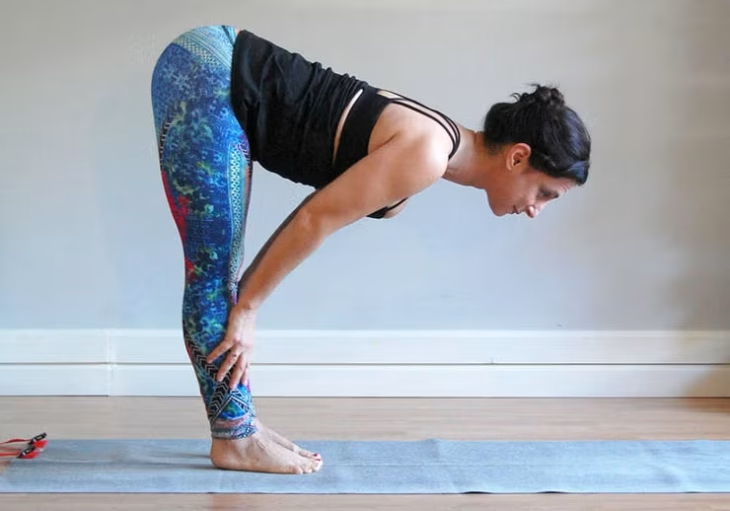
2. Prioritize Spinal Alignment Over Depth
In any hamstring stretch, the goal is to hinge from the hip joints, not to round the spine. Rounding the upper and lower back to force your head closer to your knees places immense, dangerous pressure on the intervertebral discs. Keep your spine long and your chest open, even if it means you cannot fold very far.
3. Use Props Strategically
Yoga blocks, straps, and blankets are not signs of weakness; they are tools of structural integrity. Props effectively bring the floor closer to you, allowing your muscles to relax enough to actually release tension. If a muscle is straining under intense strain, it cannot open.
Step-by-Step Yoga Sequence for Hips and Hamstrings
This sequence is designed progressively. It begins with gentle, supported movements to warm the joint capsules, moves into active standing poses to build heat, and concludes with deep, passive holds to target the dense connective tissues.
Phase 1: The Warm-Up and Joint Mobilization
Supta Padangusthasana (Reclined Hand-to-Big-Toe Pose)
This is the safest way to stretch the hamstrings because the floor completely supports the spine, eliminating lower back strain.
-
Lie flat on your back with your legs extended.
-
Loop a yoga strap around the ball of your right foot.
-
Extend your right leg toward the ceiling, keeping your arms straight but your shoulders relaxed down into the mat.
-
Keep your left leg active and pressed into the floor.
-
Hold for 10 to 15 deep breaths, then gently lower and switch sides.
Low Lunge (Anjaneyasana)
This pose directly targets the deep hip flexors and psoas of the back leg.
-
From a tabletop position, step your right foot forward between your hands, aligning your knee directly over your ankle.
-
Lower your left knee to the floor, sliding it back until you feel a gentle stretch in the front of your left hip.
-
Place your hands on blocks on either side of your front foot, or lift your torso and place your hands on your right thigh.
-
Keep your tailbone lengthening downward to protect your lower back.
-
Hold for 45 seconds, then switch sides.
Phase 2: Active Opening and Alignment
Half Splits (Ardha Hanumanasana)
This pose isolates the hamstring of the front leg while maintaining pelvic stability.
-
From your low lunge position, shift your hips back so they sit directly over your back knee.
-
Straighten your front leg, flexing your front foot so your toes point toward the ceiling.
-
Place your hands on blocks under your shoulders.
-
Inhale to lengthen your spine, and exhale to gently hinge forward from the hips, keeping your collarbones broad.
-
Maintain for 60 seconds on each side.
Pyramid Pose (Parsvottanasana)
An excellent standing posture that builds structural strength while intensely lengthening the hamstrings.
-
Stand at the top of your mat, then step your left foot back about three feet. Turn your back toes out at a 45-degree angle.
-
Ensure both hip bones point straight ahead like headlights.
-
Place your hands on your hips, inhale to find length in your torso, and exhale to hinge forward over your right leg.
-
Bring your hands down to blocks or the floor. Focus on pulling your right hip back and pushing your left hip forward to keep the pelvis square.
-
Hold for 5 to 8 breaths.
Phase 3: Deep Passive Releases
Pigeon Pose (Eka Pada Rajakapotasana)
A classic, powerful external hip opener that targets the piriformis and glutes.
-
From a downward-facing dog or tabletop position, bring your right knee forward behind your right wrist.
-
Place your right ankle somewhere behind your left wrist. The angle of your front shin depends entirely on your knee health; it does not need to be parallel to the top of the mat.
-
Extend your left leg straight back behind you, ensuring the foot is not turning inward.
-
Look behind you to ensure your leg is straight. Inhale to lift your chest, and as you exhale, slowly walk your hands forward, lowering your torso onto blocks or the floor.
-
Stay for 2 to 3 minutes, breathing into the outer right hip, then repeat on the left.
Bound Angle Pose (Baddha Konasana)
This pose targets the inner thighs, groins, and adductors, which often tighten in tandem with the outer hips.
-
Sit tall on your mat. If your lower back rounds, sit on the edge of a folded blanket.
-
Bend your knees and bring the soles of your feet together, letting your knees fall open to the sides.
-
Hold your ankles or feet. Inhale to lift through the crown of your head, keeping your shoulders down.
-
Exhale to lead with your heart as you fold forward, using your elbows to gently guide your thighs downward.
-
Hold for 10 deep breaths.
                                  YOGA PROPS UTILIZATION
   ┌─────────────────────────┬─────────────────────────┬─────────────────────────┐
   │          PROP           │      PRIMARY USE        │    ANATOMICAL BENEFIT   │
   ├─────────────────────────┼─────────────────────────┼─────────────────────────┤
   │                         │ Elevates the floor in   │ Reduces spinal rounding │
   │ Yoga Blocks             │ lunges and forward      │ and prevents lower back │
   │                         │ folds                   │ strain                  │
   ├─────────────────────────┼─────────────────────────┼─────────────────────────┤
   │                         │ Bridges the gap between │ Allows hamstrings to    │
   │ Yoga Strap              │ hands and feet in       │ open without forcing    │
   │                         │ extensions              │ reaching                │
   ├─────────────────────────┼─────────────────────────┼─────────────────────────┤
   │                         │ Tilts the pelvis        │ Relieves stress on knee │
   │ Folded Blanket          │ forward when sitting    │ joints and raises hips  │
   └─────────────────────────┴─────────────────────────┴─────────────────────────┘
Frequently Asked Questions
Why do my knees hurt when I try to do deep hip-opening poses?
Knee pain during hip openers is a warning sign that you are borrowing mobility from the wrong joint. The hip is a mobile ball-and-socket joint, whereas the knee is a stable hinge joint meant to move only forward and backward. When the hip is too tight to rotate, the twisting force travels down the leg and strains the ligaments of the knee. If you feel any sensation in your knees during a hip opener, immediately back out of the pose and use props for support.
How often should I practice yoga to see improvements in my flexibility?
Consistency is far more valuable than intensity. Practicing for 15 to 20 minutes every day, or every other day, will yield significantly better results than a single two-hour session once a week. The nervous system requires frequent, gentle reinforcement to understand that it is safe to allow the muscles to lengthen permanently.
Is it normal for my legs to shake during hamstring stretches?
Mild shaking is relatively normal and is usually a sign of muscle fatigue or the nervous system navigating a new range of motion. However, if the shaking is violent, accompanied by sharp pain, or makes it impossible to breathe smoothly, your body has entered a protective fight-or-flight state. Back out of the pose until the shaking stops and you can regain a calm breath.
Should I stretch my hips and hamstrings if I have lower back pain?
Yes, but with extreme caution and proper alignment. Tight hips and hamstrings are often the direct cause of lower back pain because they alter the natural mechanics of the pelvis. Focus on reclined poses like Supta Padangusthasana or supported lunges where your spine can remain completely neutral and supported, avoiding deep, unsupported forward folds.
What is the difference between active stretching and passive stretching in yoga?
Active stretching involves contracting one muscle group to relax another, such as contracting your quadriceps to signal your hamstrings to release. This is common in standing poses. Passive stretching relies on gravity and time to relax the muscles, typically done in seated or reclined poses held for long periods. A balanced practice incorporates both methods.
Can I practice these poses if I am naturally stiff and cannot touch my toes?
Absolutely. Yoga is not about touching your toes; it is about what you learn on the way down. Being stiff means you have a built-in protective blueprint that prevents hypermobility injuries. Use blocks and straps to modify every pose so you can experience the stretch in the target muscle groups without straining your joints.
How long does it take to open up chronically tight hips and hamstrings?
Flexibility is a journey that depends on genetics, daily habits, hydration, and past injuries. While you will feel immediate relief and increased circulation after a single session, permanent structural changes to the connective tissues and muscle memory typically take several months of consistent, dedicated practice. Patience is essential.